The cultivation of winter garlic is very popular among gardeners, and many of them are faced with such nuisance as yellow on the leaves of young plants. To avoid this situation, you need to familiarize yourself with the main causes of yellowing of garlic, as well as with measures to eliminate them and prevent them.
The main causes of yellowing of garlic leaves in spring and how to eliminate them
Yellowing of garlic in spring, as a rule, is not associated with any diseases or pests (in this case, garlic usually turns yellow later - in late May or early June), so it will be easy to cope with such a problem.
- Too early landing. You may experience yellowing of the leaves of garlic if you have carried out a winter landing too early. The plant in this case can form leaves and go into the winter with them. In this case, the leaves fall into an unfavorable environment (cold, lack of lighting, heavy snow cover), which negatively affects their development and appearance, and, unfortunately, such a plant is unlikely to be able to bring a good crop. To avoid such problems, try to plant garlic no earlier than mid-October (in the southern regions - at the beginning or middle of November), when cold temperatures are finally established. To revive the yellowed leaves, treat them with a solution of some stimulant (Epin or Zircon will do), having prepared it according to the instructions. Also provide the plants with top dressing (1 tbsp. Urea + 1 tbsp. Dry chicken droppings + 10 liters of water), carefully pouring them under the spine. To consolidate the result, repeat watering another 2-3 times with an interval of 10-14 days. Also note that during the season such garlic will need intensive care.
- Spring frosts. Return spring frosts are a fairly common occurrence, and garlic may well suffer from them. To prevent this situation, follow the weather forecasts in order to have time to remove the sprouts under temporary shelter (small sprouts can be removed under the film, for higher shoots you will have to build a greenhouse so as not to damage them). If you didn’t succeed in covering the garlic in time, treat the leaves with a solution of a stimulant (Epin or Zircon are suitable), having prepared it according to the instructions.
- Insufficient embedment depth. If your garlic immediately forms yellow leaves, then this is a sign of too small seeding of seed in the soil. In this case, the measures are the same as with an early landing. To avoid a similar situation in the future, it should be remembered that you need to plant the cloves to a depth of 4-5 cm, and then mulch the bed with a layer of sawdust or straw 7-10 cm thick.
- Lack of nutrients. Often, the yellowing of the leaves of garlic indicates a lack of nitrogen or potassium. In this case, root and foliar top dressing will be useful.
- Feeding option number 1. Lift the aisles and in the center make a shallow (2-3 cm) groove. Pour urea into it at the rate of 15-20 g / m2. Fill with earth and water abundantly. Mulch the bed (straw or sawdust will work well) so that the soil remains moist for as long as possible and the fertilizers dissolve.
- Feeding option number 2. Prepare a solution of ammonia (1 tbsp. L. The drug is diluted in 10 l of water) and carefully pour the sprouts under the spine.
- Feeding option number 3. Prepare the solution by diluting 20-25 g of urea in 10 l of water. Spray leaves from a spray bottle. Repeat the procedure after 7-10 days. Such treatment is best done in the evening in dry, calm weather.
- Feeding option No. 4 (for low-fertilized soils). Prepare the solution by diluting 5 g of potassium sulfate in 1 liter of water. Spray leaves from a spray bottle. Such treatment is best done in the evening in dry, calm weather. You can also add potassium with watering, but for this you need to take 15-20 g of fertilizer per 10 liters of water.

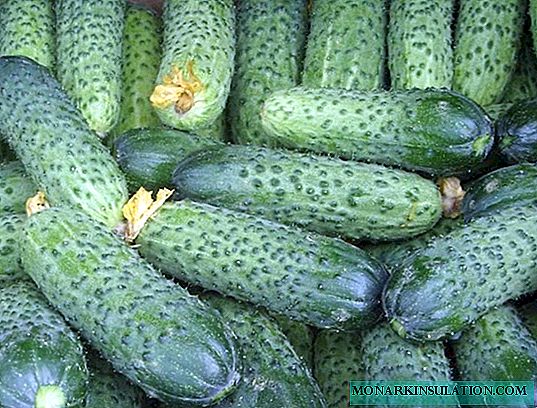
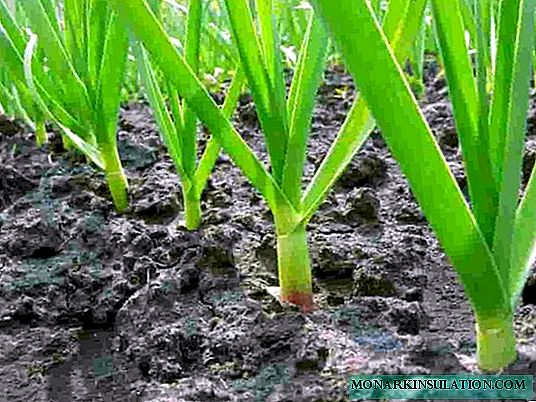
Yellowing of garlic in early spring often indicates a lack of nutrients

I always have good garlic. I spray with potassium sulfate. One teaspoon of potassium sulfate per liter of water. Spray in the evening so that the solution does not immediately dry in the sun. For beds - a solution of organics according to this recipe. Insist on mowed grass, add wood ash to the container and water it. And of course, soak the cloves of garlic in potassium permanganate.
milena40
//www.agroxxi.ru/forum/topic/7252-%D0%BF%D0%BE%D1%87%D0%B5%D0%BC%D1%83-%D0%B6%D0%B5%D0% BB% D1% 82% D0% B5% D0% B5% D1% 82-% D1% 87% D0% B5% D1% 81% D0% BD% D0% BE% D0% BA-% D0% B2% D0% B5% D1% 81% D0% BD% D0% BE% D0% B9-% D1% 87% D1% 82% D0% BE-% D0% B4% D0% B5% D0% BB% D0% B0% D1% 82% D1% 8C /
Causes of yellowing garlic - video
Prevention of yellowing of garlic leaves
It is not difficult to prevent yellowing of garlic - in addition to the above recommendations regarding the time and depth of seeding of cloves, it is enough to follow a few simple rules regarding the choice of the site and the processing of seed.
The right choice and preparation of the sowing place
For garlic, areas with light sandy loamy or loamy soils located in a lighted place are best suited. In addition, the selected site should not be swampy, so make sure that the groundwater runs at a depth of not less than 1.5 m. One month before planting, the soil must be fertilized, so add the following fertilizers per m2: humus (5-6 kg) + double superphosphate (1 tablespoon) + potassium sulfate (2 tablespoons) + wood ash (250-350 g, and if you deoxidized the soil, then 150-200 g). If the soil is heavy, for example, clay, then add sand at the rate of 3-5 kg / m2.
Deoxidation of the soil
For garlic, areas with a low or neutral level of acidity are preferred, so if necessary, sprinkle ash (300-350 g / m 5-7 days before applying the main fertilizer complex2) or dolomite (350-400 g / m2), and then dig the site.
Deoxidation is advisable if light plaque appears on the soil surface, horsetail, moss or meadow grow well or rusty water accumulates in pits.

The use of ash helps not only deoxidize the soil, but also enrich it with useful substances
Crop rotation
It is advisable to plant garlic in its original place after 3-4 years. If you don’t have the opportunity to fertilize the plot, then try not to grow garlic where beets and carrots grew before, as they greatly deplete the soil. For the same reason, garlic should not be planted on a site previously used for tomatoes, radishes and radishes, as well as for onions of all varieties, since in this case there is a risk of not only a shortage of nutrients, but also infection by common diseases and pests (onion fly, onion nematode, fusarium).
Processing garlic before sowing
There are several types of solutions for processing, and you can choose the most attractive option for you:
- A solution of potassium permanganate. Dissolve 1 g of powder in 200 g of water and place in them cloves for 10 hours.
- Ash solution. 2 cups of ash pour 2 liters of boiling water and let cool. Then drain the light part into a separate dish and soak the teeth in it for 1 hour.
- Mixed processing. Prepare a salt solution (6 tbsp. L. Diluted in 10 l of water) and place the cloves in it for 3 minutes, and immediately after it - in a solution of copper sulfate (1 tsp. Powder diluted in 10 l of water) for 1 min
Unlike spring crops, garlic is not required to be washed. But keep in mind that after all treatments, the garlic needs to be dried before sowing it in the ground, so do the processing about a day before sowing.
As you can see, to prevent the appearance of yellowness on the leaves of young garlic and fight it is not difficult, just follow the simple tips for planting this crop and make fertilizers on time. Responsibly treat the preparation of the site, carry out the crops on time, and garlic will delight you with its health and good harvest.